
So you want to learn how to make a reclaimed wood dining table? Don't have a ton of time? Well I can certainly show you how WE did it.
While there are a million ways to skin a cat, this 'how to' will give you one clear and easy way to make yourself an impressive rustic dining table in four hours.
Scroll down to follow the 'how to' guide, or watch us do it in the video below.
Phase 1: Prep the wood
Phase 2: Assemble and cut table top
Phase 3: Finish the table top
Phase 4: Attach the legs
Stuff we used to make the reclaimed wood table top

Phase 1: Prep the wood
Measure and cut wood
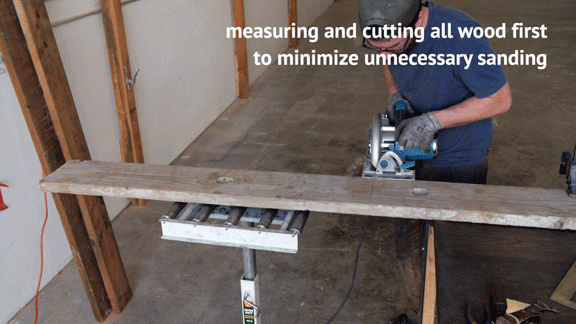
This will vary depending on the desired size of your reclaimed wood furniture. We used five pieces of reclaimed lumber for our table top. (2) 2"x8", (2) 2"x6", and (1) 2"x10". This will make our table about 33" wide. We also used 1"x3" wood for support boards.
- We cut the lengths of the top boards down to nearly 5' (we'll do the final end cut after the table top is assembled).
- We cut 1"x3" into four pieces at 30" long, to use as support boards underneath. For asthetic purposes, we then cut 45° angles on the ends of the support boards with a miter saw.
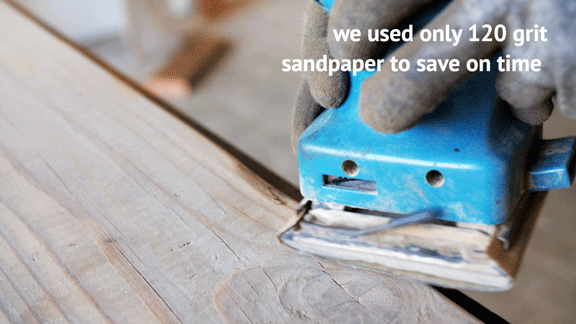
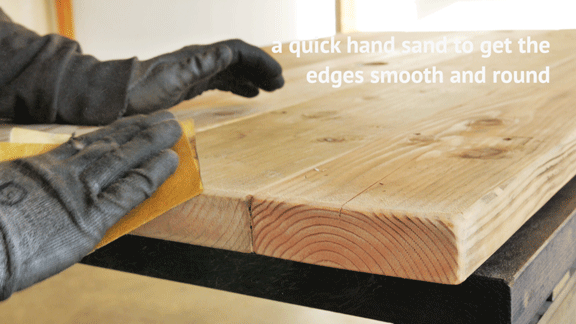
- We sanded all of the wood with 120 grit sandpaper.
If you want a SUPER smooth top, you might do more sanding than we did. For a more formal kitchen table, consider starting with 60 grit, then 120 grit, and finally 220 grit. But for this rustic dining table style, we didn't need to get too crazy with the sanding.
Sand
Phase 2: Assemble and cut table top
Place support boards

A lot of this depends on your preference and dimensions of the material you are using. Just do your best to keep the boards centered and spaced evenly.
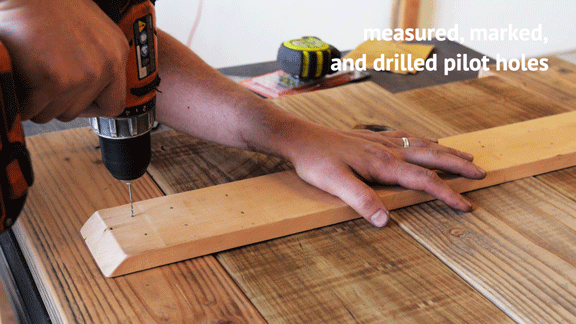
- DO keep in mind where you will want to mount your table legs when finished.
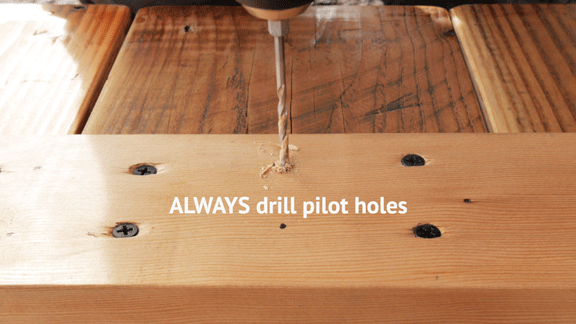
- We measured and marked for 20 sheetrock screws (#6, 15⁄8") to be used per support board.
- We drilled pilot holes using 1⁄8" drill bit. This helps prevent splitting of the wood.
Drill pilot holes
Attach support boards
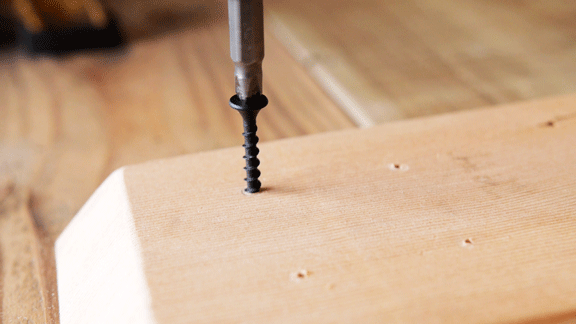
- We screwed in support boards with our electric drill.
We were able to get four screws into each piece of reclaimed top layer wood, through the support board.
If you can, use clamps to secure your support boards while attaching them.
- Cut the ends off of the reclaimed wood table top
We used a jig to be sure we made straight cuts. Soon, I'll post a link here to a video that shows how we made that jig.
Cut table ends

Phase 3: Finish the table top
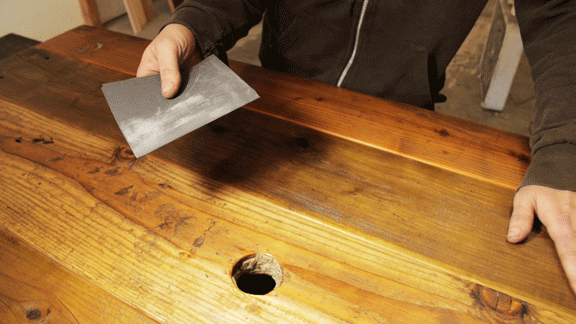
Sand ends of table
- Sanded the ends of the table to match the edges of the rest of the top.
For a modern reclaimed wood furniture style, we wanted to take a little bit more off of the edges than normal. To speed this up, we used a grinder with a sanding flap disc wheel on it. Then we went back over it with a 120 grit hand sanding to smooth it out.
- Wiped down the entire table top with a damp rag.
- Applied one coat of stain with a clean cotton rag. Let dry 1 hour.
We used this Varathane Fast Dry stain in 'Natural' color. We feel that tinted colors are not the best stains for reclaimed wood, as it can hide too much of the character.
The quick dry time helps keep this project easy, but if you can afford the time, use something with a longer dry time for a more natural feel.
Stain

Finish with Wipe-On poly

- Wiped on two coats of polyurethane.
There are many options on how to finish a reclaimed wood table top. This is a tried and true method. It's really hard to go wrong.
We used this Wipe-On Poly to apply two thin coats. It only takes 1 hour to dry after each coat.
- Light sanding with 1500 grit sandpaper.
Lightly run a super fine grit sandpaper across the table. This will give it the final touch of smoothness that you want. Wipe off any dust with a damp rag.
Quick finish sanding
Phase 4: Attach table legs
Mark for placement

- Positioned legs and marked for pilot holes.
We are using the Symmetry Hardware Big 90 table legs that give this modern reclaimed wood dining table a good dose of industrial style. For a dining table application like this, we went with the thicker 1/2" flat bar steel option.
After the legs were centered, we marked the table top through the mounting holes.
- Drilled pilot holes for table leg screws.
We used a 3⁄32 drill bit to make room for our lag screws.
Drill pilot holes
Fasten legs to table top

- Mounted legs to table top with electric drill.
Symmetry Hardware includes the 1⁄4" hex head fasteners. We drove those in with our electric drill and hex head bit.
And that's it!

Not only were we able to get this done in 4 hours (not including dry time), but this reclaimed wood dining table project was affordable.
Your mileage may vary, but we spent a total of $310 on a rustic dining table that you might find in a boutique reclaimed wood furniture shop for around $600+
Was this DIY guide easy to follow? What's missing? I would love your feedback. Questions and comments below.
Jonathan Poulsen
Oct 26, 2019
Hej it look beautiful, i am looking for making some kind myself, maybe a dinner table, at an other time, but right now i am concentrating on making a Desktop, with room for a monitor screen, soundsystem, keyboord, and mouse, and pc at the floor, but i am aa bit unsecure about the size, and that stuff, i will perfer metal legs.
I also wundering how i can make a nice looking bedside table, but nok filled with unnerssery stuff,